Getting Started and Setup with Oracle
This course uses the Oracle DBMS for the duration of the course. We will be accessing the database through the SQL Developer GUI. Your login and password credentials will be provided to you in one of 2 ways
- Your professor will upload your login and password to the course gradebook for your reference.
- If you are working on a locally installed copy of Oracle, you will likely setup your own login and password during the setup procedure.
The following video is a video tutorial on installing SQL Developer: YOu can either watch the video or follow the instructions below.
Downloading and Installing SQL Developer
This procedure will change based on if you are using school lab computers or your own personal computer. If using your own personal computer, the process will change slightly. This guide only covers installing SQL Developer on Windows 10 machines.
Using School Lab Computers
When accessing SQL Developer from a lab computer, simply find SQL Developer in MyApps and launch the software.
Using Personal Computers
Through MyApps
As a registered student at Seneca College, you should have access to MyApps from any computer, although it will require setting up the first time.
- Go to https://myapps.senecacollege.ca/
- Login using your MySeneca credentials
- Navigate to SQL Developer and launch the application.
- A series of instruction will follow, most of the time just using the defaults will be fine.
Installing Locally
If you wish to install SQL Developer on your machine and still have access to it after leaving school or are not using a Windows PC, you will want to download the installation package and install it from there.
- ORACLE DOWNLOADS
- Choose the version appropriate for your operating system. Most Win10 machines that are newer than about 5 years old will choose the 64-bit version with JDK included. The download is almost 500MB, the time to download the software will depend on your internet connection. Do not download the software through your mobile phone.
- You may be required to create an account; it is free, and they only send about one email a month.
- After downloading the software, you will see that it is a zip file (win10 version). You do not actually need to install the software, but simply extract the files to a location where you want it stored.
- It is suggested that you create a shortcut to the sqldeveloper.exe file on your desktop or taskbar.
- Run the .exe file to start SQL Developer. If the JDK is required on your computer, it will install automatically on the first use only.
SQL Developer GUI and Sample Database
- Open the SQL Developer Application. There should be an icon on your desktop or in the start menu search for SQL Developer.
- This screen will appear. If you previously logged on and made connections, there will be entries below the word connections. You can then click on those entries and it will save entering data each time.
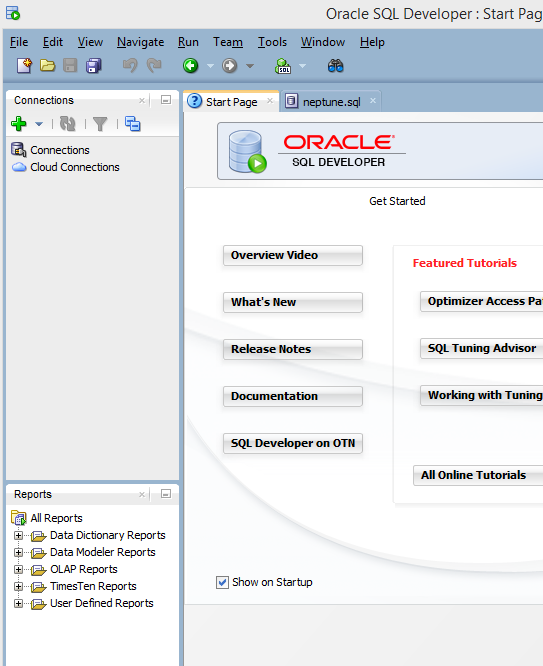
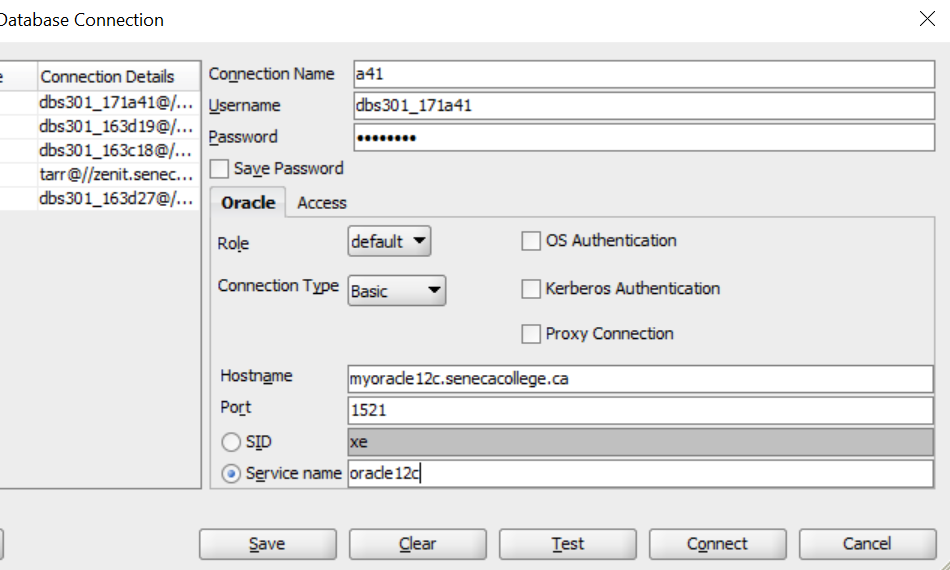
- Click on the green PLUS to create a new connection and fill in the data as shown below. The connection name can be anything such as your id or initials.
- Connection Name: Anything you want to call it: example: MyConnection or DBS211
- UserName and Password: have been assigned to you
- Save Password: is optional, I would save it for class purposes, but in the real world, we would not save that information
- Hostname: myoracle12c.senecacollege.ca
- Port: 1521
- Click the Service Name radio button and enter: oracle12c
- Test the connect, if successful, click Save and then Connect
- Once you successfully connect, the following screen appears:

- The first time you connect to the Oracle server through SQL Developer, you will need to run an SQL Creation Script to create the tables, data, constraints, etc. for the course sample database. A couple of creation scripts that are available are:
in order to run the creation scripts:
- Open the provided file in your favourite text editor (example: Notepad++)
- copy all of the content
ctrl-A, and paste itctrl-Vinto the large editor window shown above. - Select all the content
ctrl-Aand run the script using the Run Statement buttonctrl-enter: It looks like a green arrow near the top left corner.
- Expand the connection and then the “Tables” section from the left menu. If the tables do not appear, try clicking the refresh button and the expanding tables again.
- Erase the creation script from the SQL Worksheet window (ctrl-A and delete key).
- Enter a simple SQL Select statement to test the data is present:
EXAMPLE:
SELECT * FROM employees;
Highlight the code and click the run button
- If the data appears in the Query Results window at the bottom, you have successfully connected.